How to Preserve Your Trophy: Taxidermy and Mounting Options
For hunters at Cuppen’s Game Ranch — Lexington, Michigan
Bringing home a monster buck from Cuppen’s Game Ranch in Lexington, Michigan, is a thrill few things can match. After the shot and the celebration, the next big decision is how to preserve that memory forever. A professional taxidermy mount transforms a harvested buck into a centerpiece, conversation starter, and family heirloom. This guide walks you through everything you need to know about taxidermy and mounting options — from choosing the right taxidermist and deciding on pose and strong-side orientation, to selecting full-body vs. shoulder mounts and realistic habitat displays. If you’re booking a hunt at Cuppen’s Game Ranch and expect to harvest the giant buck of your dreams, planning your trophy’s preservation in advance will make the post-hunt process smoother and more satisfying.
Booking your hunt and planning the mount
When you book a deer hunt at Cuppen’s Game Ranch in Lexington, Michigan, consider taxidermy before you arrive. Let the ranch staff know your intentions — many hunters prefer to coordinate with their chosen taxidermist.
Choose the right taxidermist
This is the most important decision you’ll make about your mount. A talented taxidermist combines anatomical accuracy, artistic skill, and attention to detail to produce a life-like, lasting mount. You may already have a great taxidermist, but if you are looking, Cuppen's can give you some names of great taxidermists in the area. You can also see some of the deer mounted in the lodge to see examples of those taxidermists recommended by Cuppen's Game Ranch.
What to look for in a Taxidermist:
- Portfolio and references: Review photo galleries and ask for references. Compare recent work to ensure consistent quality.
- Experience with deer: Deer anatomy, caping, and ear/eye setting are specific skills that come with experience.
- Communication and timeliness: A professional who listens to your vision and provides realistic timelines is essential. Good taxidermists are clear about their workflow and completion dates.
- Specialty skills: If you want a complicated full-body pose or a realistic habitat pedestal, confirm the taxidermist’s experience with similar projects.
- Pricing and contracts: Understand what’s included (mannequin, repairs, mounting hardware, habitat materials, shipping, and touch-ups). Get a contract with timelines and payment terms.
Tip: Local recommendations matter. Ask Cuppen’s Game Ranch staff and others for referrals. Browse galleries from respected names in the industry (for pose ideas, taxidermy supply sites like McKenzie and Joe Coombs offer visual libraries), then consult with your chosen taxidermist.
Mount types: Pros, cons, and costs
There are several popular mounting styles. Which you choose depends on budget, display preference, and the story you want the mount to tell.
1. Shoulder mount
- Description: The classical and most common style. Only the head and neck (cape) are mounted.
- Pros: Most affordable; clean silhouette; ideal for smaller spaces; emphasizes antlers and facial features.
- Cons: Less context/realism; no body or habitat elements.
- Best for: Budget-conscious hunters, trophy-focused displays, or collectors with limited wall space.
2. Half-body (torso) mount
- Description: Includes the head and the front portion of the shoulders and chest, sometimes to the mid-rib. Often displayed with a habitat background or pedestal.
- Pros: Offers a more lifelike presentation than a shoulder mount; allows some torso musculature and fur detail; gives better balance in room settings.
- Cons: More expensive than shoulder mounts; requires more wall or floor space, depending on the presentation; limits where you can place this mount in your trophy room.
- Best for: Hunters who want extra realism without committing to the cost and size of a full-body mount.
3. Full-body (lifesize) mount
- Description: Entire animal is recreated on a realistic mannequin, set in a natural pose — standing, walking, or bedded. Typically installed on a habitat base.
- Pros: Highly realistic and dramatic; offers the greatest visual impact; places the animal in its habitat.
- Cons: Most expensive; requires significant space and structural support; longer turnaround time.
- Best for: larger trophy rooms, lodges, corporate displays, or hunters wanting a naturalistic presentation.
4. Pedestal and habitat mounts
- Description: Typically, shoulder style mounts are used on a pedestal — a freestanding base with detailed habitat work (brush, rocks, grasses). The cape is mounted to a mannequin and integrated into a habitat.
- Pros: Museum-quality presentation; excellent for lifelike scenes; allows viewing from multiple angles; some pedestals allow mounting 2 or 3 animals on brackets on the pedestal base to save space.
- Cons: Adds cost and space requirements; consumes more floor space; requires detailed consultation on habitat preferences.
- Best for: Display centers, living rooms with a fair amount of floor space, commercial displays, and dramatic trophy presentations.
Choosing the right mount for your space and budget
- Budget: Shoulder mounts are cost-effective; half-body and full-body mounts increase costs based on time, materials, and complexity.
- Space: Measure wall and ceiling heights; full-body mounts need floor space and sometimes reinforcement for heavy bases.
- Aesthetic: Do you prefer rustic and subtle, or life-like and dramatic? If you want to show the deer in its native environment (Michigan brush, oak woods, agricultural edges), plan for habitat work.
- Visibility: If you plan to display your deer in a room where guests view it from one direction, certain poses work better (see the 'strong side' below).
Pose selection and the “strong side” principle
A key to making a mount look bigger and more impressive, in some cases, is the choice of pose and orientation. Many people choose poses that make the animal’s “strong side” face the primary viewing angle. This is a subtle but powerful visual trick.
Why it matters:
- Visual impression: Turning the mount so the strong side faces the room accentuates the animal’s size and rack character.
- Photographic and trophy display: A mount oriented with its strong side forward photographs better and usually looks more impressive, but every deer is different. Choose the best position for your deer in relation to where it will be displayed.
- Balance and realism: A good taxidermist will balance realism with presentation — the deer should read as natural while still highlighting your buck’s best features.
Discussing poses with your taxidermist
- Reference photos: Provide photos of the deer from multiple angles if possible.
- Viewing location: Tell your taxidermist exactly where the mount will hang or stand and what the primary viewing angle will be (e.g., above a fireplace, on a lodge wall, or on a pedestal in the entryway).
- Preferred emphasis: Ask that the animal be oriented to present the strong side to the main room. A good taxidermist will advise on natural poses that also maximize visual appeal.
- Inspiration resources: Look at pose libraries like those from McKenzie and Joe Coombs for examples of shoulder, life-size, and full-body poses, then consult your taxidermist about what’s feasible and appropriate.
Habitat choices for half, full, and pedestal mounts
Half mounts, full mounts, and pedestal mounts often incorporate habitat to create a realistic scene. Habitat selection enhances the mount's storytelling and anchors the deer in its Michigan environment.
Popular habitat themes:
- Oak-hickory woods: Representative of many Michigan landscapes — leaf litter, oak branches, and low brush.
- Agricultural edge/food-plot style: Corn stalks, standing grasses, and crop residue for bucks taken near farms or food plots.
- Swamp and cattail edge: For deer harvested near wetlands — use cattails, sedges, and mud textures.
- Late-summer green browse: Lush green plants and ferns for summer hunts.
- Winter scene: Snow, bare branches, and muted grasses for rut-season or late-season mounts.
How to communicate habitat preferences
- Say whether you want season-specific settings (e.g., rut, snow) or a generalized habitat that won’t look dated.
- Confirm materials: Ask what materials the taxidermist will use — high-quality artificial plants, preserved natural elements, and paint/texturing techniques — to ensure longevity and realism.
- Budget: Habitat work can significantly raise the price. Decide whether you want a minimal base, a detailed diorama, or something in between.
Pose examples and considerations
Shoulder mount poses
- You may want to choose an upright pose or perhaps something different, like a semi-sneak or a full sneak, to add some variety to your trophy room.
- Classic straight-on: Symmetrical and formal; emphasizes antler symmetry.
- Quarter-turn: Offers depth and gives the impression of alertness. Good for fireplace overmantels.
- Three-quarter turn: Presents the strong side and wider rack; often the most impressive for wall displays.
Full-body/lifesize poses
- Standing and walking: Natural, dynamic, and great for pedestal bases; shows body mass and antler spread.
- Action poses: Dramatic and costly; often used in lodge or museum settings.
- Bedded poses: Intimate and natural; great for close indoor displays.
Pedestal and diorama considerations
- Viewing angles: If people will walk around the display, choose a pedestal that presents the deer attractively from multiple directions. If the display is viewed primarily from one side, orient the strong side forward.
- Lighting: Good lighting enhances realism. Discuss integrated lighting or placement to minimize glare.
- Scale and proportion: The habitat and base should be in scale with the animal, and the room — oversized bases or props can overwhelm the mount.
Long-term care and maintenance
- Dusting: Gently dust with a soft brush or low-suction vacuum brush attachment.
- Sunlight: Avoid direct sunlight to prevent fading of fur and paint. UV filtering on windows helps.
- Humidity and temperature: Keep mounts in stable, moderate environments. Extreme humidity encourages pests and mold; extreme dryness can cause cracking in bases or mounts.
- Pest control: Inspect for insects and rodents periodically. Consider professional fumigation only by a qualified taxidermist if infestation occurs.
- Repairs and touch-ups: Over the years, mounts may need touch-ups for eyes, noses, or habitat elements — ask your taxidermist about repair services and warranties.
Budgeting and timeline
- Cost range: Shoulder mounts are typically the least expensive; half-body and full-body mounts can cost significantly more. Habitat work, custom poses, and pedestal bases add to costs. Prices vary by taxidermist, region, and complexity.
- Timeline: Quality work takes months, often 6–12 months or longer for busy taxidermists. Book early and discuss rush options if needed. Cuppen’s clients should plan accordingly as their hunt approaches.
Other considerations
Asking the right questions of your taxidermist
- Can I see a full portfolio of recent deer work?
- What is your timeline from receipt of the cape to delivery?
- What materials do you use for mannequins and habitat?
- Can you provide references from recent customers?
- How will you orient the mount so the strong side faces my chosen display area?
- What are the storage and shipping options if I’m out of state?
Inspiration and research resources
- Browse galleries from experienced taxidermists and pose libraries (for pose inspiration, look up McKenzie and Joe Coombs pose catalogs).
- View online galleries to see some example mounts and poses you might like.
- Consult with Cuppen’s Game Ranch staff for local and regional taxidermist recommendations and examples from past clients.
Final steps: From harvest to showroom
- After your hunt at the Cuppen’s Game Ranch, it’s best to make arrangements to meet with your taxidermist. Don’t put it off, as leaving it in the freezer for an extended period can damage your cape.
- Confirm details with your taxidermist: mount type (shoulder, half, full, pedestal), pose, strong-side orientation, habitat preferences, timeline, and cost.
- Enjoy your mount and care for it as guided to preserve it for decades.
Conclusion
If you’re planning a hunt at Cuppen’s Game Ranch in Lexington, Michigan, and dreaming of harvesting a giant buck, start thinking about taxidermy early. Coordinate with Cuppen’s staff when you book your hunt, choose a reputable taxidermist, and discuss pose, strong-side orientation, and habitat preferences to ensure your trophy is presented at its absolute best. Ready to experience a ranch hunt and bring home the buck of your dreams? Book your hunt at Cuppen’s Game Ranch today and let us help you take the next step toward a trophy you’ll be proud to display for generations.
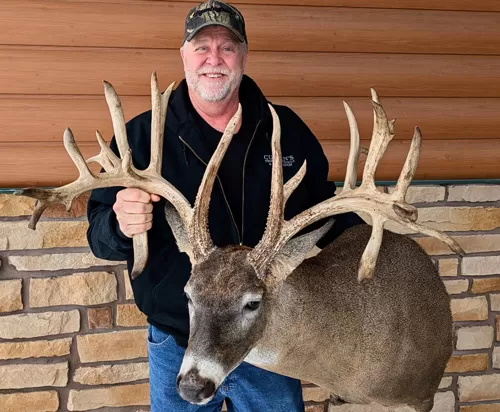
Photos
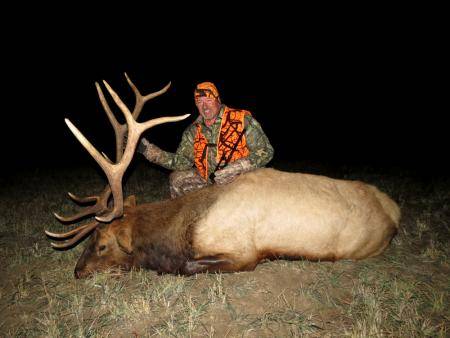


We offer trophy whitetail deer hunting and trophy elk hunting in Lexington, Michigan.
Copyright © 2026 Cuppen's Hunting Ranch. Website by JZ Internet